Your machine is out of the box and the first shot tasted like grapefruit and ash. Nothing is broken — you are two variables away from good coffee, and this is the order to fix them in.
By Ilane Tall · Updated August 12, 2026 · Research-based.
Reader-supported: some links on this page go to Amazon, and we may earn a commission if you buy, at no extra cost to you. It never changes what we recommend.
Espresso is a small, unforgiving recipe: water at roughly 9 bar through a compressed bed of coffee in about half a minute. Every decision you make beforehand shows up in the cup, which is why the same beans and the same machine give you something excellent on Tuesday and something undrinkable on Wednesday.
The fix is not talent. Once you weigh the coffee going in, weigh the liquid coming out and time the middle, espresso becomes a feedback loop: taste it, read the clock, change one thing, repeat. Do that deliberately and it takes a week; do it by eye and it takes months.
What you actually need
You can pull espresso with the machine and the scoop in the box, but not consistently: a scoop measures volume while coffee is dosed by weight, and that weight shifts with the roast and the grind. Four things genuinely change your results.
A scale that reads to 0.1 g. The cheapest large upgrade in coffee, used twice per shot: to weigh dry coffee into the basket, and under the cup to weigh the liquid coming out. Resolution beats capacity — 0.1 g increments show that today's dose is 18.4 g rather than 18.0 g, exactly the error that makes a shot misbehave for no visible reason.
A burr grinder, never a blade grinder. Burrs crush beans between two surfaces a fixed distance apart, so particles come out close to the same size. A blade grinder chops, producing dust and boulders at once, and no setting changes that. For espresso that is fatal: water at 9 bar takes the path of least resistance, racing through the gaps between boulders and barely wetting the dust, so the shot is under-extracted and bitter at once. We work through the built-in-versus-separate question in our grinder comparison.
Beans with a printed roast date, ideally 7–21 days old. Fresh coffee is full of carbon dioxide from roasting, and that gas is why espresso builds crema. Beans roasted two days ago are so gassy the shot gushes unpredictably; beans four months old have no gas left and taste papery. A "best before" date twelve months out tells you nothing.
A tamper that fits, and a timer. The included tamper is fine as long as its diameter is close to the basket's — one two millimetres too small leaves a ring of loose coffee for water to escape through. Your phone's stopwatch is a fine timer. Skip distribution wedges and bottomless portafilters for now: none of them fixes a shot fifteen seconds off target.
The starting recipe: 18 in, 36 out, 25–30 seconds
Do not invent a recipe. Start from the standard double, because the value of a known starting point is that its failures tell you something.
The starting point
18 gdry coffee in
36 gliquid espresso out
25–30 sfrom pump on
A 1:2 ratio by weight, in roughly half a minute. Every adjustment from here changes one of these three numbers, or the grind that connects them.
The dose is set by your basket, not by the internet. Most double baskets shipped with home machines are built around 16–20 g; if yours is smaller, keep the ratio and scale down, since 15 g in and 30 g out is equally valid. After tamping there should be a few millimetres of headroom below the shower screen; if the puck touches it, you are overdosed. Weigh the output too — crema is foam, so two shots of equal volume can differ by grams.
The time is a symptom, not a target. You do not force the shot to take 27 seconds by pulling levers mid-brew; you set the grind so 18 g of coffee naturally yields 36 g in 25–30 seconds. The clock is how the puck reports back, and chasing it directly — by tamping harder, say — is how people stay confused for months.
The procedure, step by step
Read it through once first: several steps exist purely to stop the ones after them going wrong.
01
Warm the machine, the portafilter and the cup
Give the machine the heat-up time its manual asks for, then run a blank shot of hot water through the locked-in, empty portafilter into the cup you will drink from, and tip it out just before you brew.
WhyBrew water leaves the boiler at roughly 195–205 °F and every cold surface steals heat from it. Cold metal early in the shot means sourness no grind change will fix — which is why the first shot of the morning is so often the worst.
02
Purge the group head
With the portafilter out, run the pump for a second or two so water flows through the shower screen into the drip tray. On single-boiler machines, do this after steaming milk too.
WhyIt flushes old grounds off the screen and stabilises the water sitting in the group. A single boiler runs far hotter for steam than for brewing, so a shot pulled straight after frothing comes out burnt and ashy.
03
Grind fresh, straight into a dry basket
Wipe the basket dry, set it on the scale, zero, and grind to your dose immediately before brewing — not the night before, not into a jar.
WhyGrinding multiplies the surface area exposed to oxygen. Ground coffee loses aromatics within minutes and vents the CO2 that builds crema, so coffee ground twenty minutes ago runs flatter and faster than the same coffee ground twenty seconds ago. Moisture makes grounds clump, and clumps become channels.
04
Distribute and level before you tamp
Grounds land in a heap, usually leaning one way. Tap the basket gently, then run a fingertip or small tool across the surface in two directions to break clumps and even the bed. If your machine came with a dose-trimming razor, use it here.
Why channelling is the enemyWater at 9 bar finds the weakest route. A low-density patch or a gap at the wall becomes a channel, and once one opens most of the water pours through it, stripping the coffee around it to bitterness while the rest of the puck is barely touched. The shot tastes thin, sour and harsh at once — the flavour people misdiagnose as "bad beans".
05
Tamp flat, not hard
Set the tamper on the bed, keep your wrist directly above it, and press straight down until the coffee stops compressing — firm rubber, not a spring. Do not lean on it, and never tamp at an angle.
WhyTamping removes air pockets, and that is done at modest pressure. Past it, extra force barely changes the puck's resistance — grind size controls flow rate — but it does add error, since heavy tamps are less repeatable than light ones. A puck tamped 2 mm deeper on one side hands water a thinner path: a channel you built on purpose.
06
Wipe the rim and lock in
Brush loose grounds off the rim, then insert the portafilter and turn it firmly into the group. Do it promptly — a tamped puck on a warm group head dries out.
WhyGrounds on the rim sit between the gasket and the metal, so the seal cannot close and pressurised water weeps around the edge instead of through the coffee.
07
Start the shot and the clock together
Cup on the scale, scale zeroed, then press brew and start the timer in the same motion — timing from when the pump engages, not from the first drop.
Why pre-infusion changes what you seeMany machines begin with pre-infusion — a short, low-pressure wetting of the puck before full pressure arrives, which the Breville Barista Express platform does by design. Dry coffee swells as it wets, and easing water in lets the bed settle before the pressure that would carve channels arrives. So little happens for the first several seconds: normal, and why you time from the button.
08
Watch the stream, stop at your target weight
First liquid should appear around 5–10 seconds in, dark and viscous, then lightening to caramel and falling as a single steady thread. Stop the pump at 36 g, swirl, and drink it promptly.
Why watch it at allThe stream is a live readout of a basket you cannot see into. Liquid at 2 seconds means almost no resistance: too coarse. Nothing at 15 seconds means it is nearly blocked: too fine. Two or three jets, or one spraying sideways, is channelling. A stream turning pale early means you have run past the good part of the extraction.
Reading the shot you just pulled
You now hold two pieces of information: the clock and the taste. They say different things, and the clock comes first.
The clock tells you about grind
Shot time measures how tightly your grounds are packed.
36 g out in 12 seconds: too coarse — wide gaps, almost no resistance. Whatever it tastes like, grind finer before changing anything else.
36 g out in 25–30 seconds: you are in the window. Start judging by taste.
Still dribbling at 45 seconds: choked — too fine. Stop it, discard the puck, grind coarser, pull again.
The taste tells you about extraction
Sour, sharp, thin, citric — under-extracted. Acids come out of coffee first, sweetness second, bitterness last, so a shot that ends early is all front-of-the-queue acidity. Usual causes: grind too coarse, shot too fast, or a cold machine.
Harsh, bitter, drying, ashy — over-extracted. Too much came out, including what you did not want. Usual causes: grind too fine, too much liquid from too little coffee, or water too hot.
Taste for sweetness, not for the absence of faults: if a change makes the shot sweeter, you moved the right way.
Change one thing at a time
This is the discipline separating people who dial in a bag in three shots from people who fight it for a week. Grind finer and raise the dose and tamp harder, and if the shot improves you have learned nothing about which change did it. Fix the dose, fix the output weight, and move the grind only, until the time lands in the window. The order:
Grind size — your primary control. Small steps: one or two clicks is a meaningful move on most home grinders, and a big jump overshoots the window.
Output weight (the ratio) — once the time is right, if the shot is thin pull less: 32 g out is more concentrated; if it is heavy and harsh, 40 g out is longer and gentler. This is the dial most people never touch, and it changes a lot.
Dose — only with a reason. A gram more raises resistance, slows the shot and changes the ratio, so the output weight has to move too.
Temperature — last, and only if your machine offers it. Lighter roasts extract reluctantly and want the top of the range; dark roasts extract easily and often taste better a few degrees cooler.
Write it down: dose, output, time, plus a word for how it tasted. Four lines of notes save a bag of beans.
Troubleshooting, by symptom
What you see or taste
What's happening
The one change to make
Gushes, done in 10–15 s
Grind too coarse
Grind finer, two clicks, same dose and output
Almost nothing out by 45 s
Grind too fine, or overdosed
Grind coarser; if the puck touched the screen, drop 1 g
Sour and thin, but time was 27 s
Heat loss, or channelling
Warm portafilter and cup; level the bed more carefully
Bitter, ashy, drying
Over-extracted
Grind coarser, or stop at 32 g instead of 36 g
Bitter only after steaming milk
Single boiler still at steam temperature
Purge the group until the water runs quiet, then brew
Two or three jets, or a sideways spray
Channelling
Break up clumps, level the bed, tamp flat
Every shot differs
Dosing by scoop, not by weight
Weigh the dose to 0.1 g, every time
If none of that helps and the machine has been in service a while, the problem may not be technique: scale build-up narrows waterways and drags brew temperature down. Our cleaning and descaling guide covers the routine.
Milk: stretch first, then texture
The goal is not hot milk with foam on top; it is microfoam — air beaten into bubbles so small the milk behaves like wet paint and tastes sweeter than what you started with. As general guidance: steam and the wand are hot enough to burn, and the wand can spit water on start-up, so purge into the drip tray and keep your hands off the metal. Follow your manufacturer's instructions for your machine's steam procedure — routines differ between single boilers, thermoblocks and automatic frothers.
Purge the wand. Open the steam into the drip tray until you get dry steam instead of a spurt of water — that water is condensate, and it would thin your milk.
Fill a cold jug to just below the base of the spout. Cold milk buys working time, because texturing has to finish before the milk gets hot — and milk expands, so an over-filled jug overflows.
Stretch — introduce the air. Tip just under the surface, steam fully open. You want a steady, quiet "tsss": air being drawn in. Loud tearing means the tip is too high and you are making big bubbles. First few seconds only — a warm jug stops accepting air.
Texture — break the bubbles down. Sink the tip deeper and angle it off-centre so the jug spins like a whirlpool: that rotation shears big bubbles into microfoam. Keep it spinning to temperature, adding no more air.
Stop by temperature. A cheap probe thermometer removes the guesswork: aim for roughly 130–140 °F, and past about 155 °F milk tastes scalded. By feel, the cue is the moment you can no longer comfortably keep your palm on the jug.
Knock, swirl, pour. Tap the jug to pop surface bubbles, swirl until it looks like glossy paint, and pour immediately — milk separates within thirty seconds.
Wipe the wand immediately. Damp cloth the second you finish, then a short blast of steam to clear the tip: milk proteins bake onto hot metal in seconds and block the air holes.
Whole dairy milk is the most forgiving thing to learn on, because its fat and protein stabilise the foam. "Barista" plant milks carry added protein; standard ones often split.
What your machine changes about all this
The procedure is the same on every pump machine. What differs is how many steps your hardware does for you, and how much room it leaves you to correct — the notes below cover machines from our main roundup.
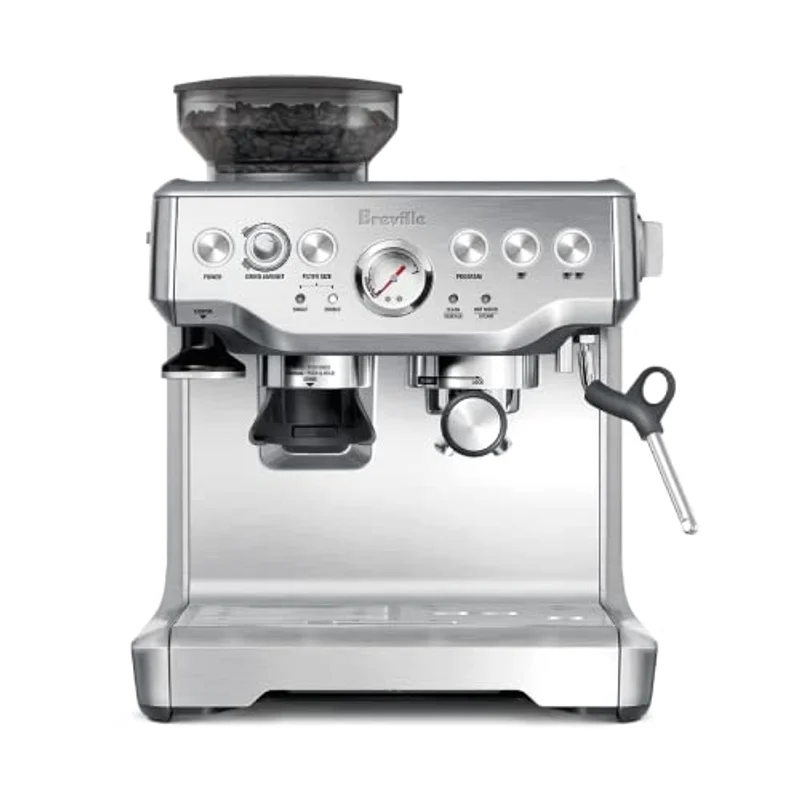
Breville BES870XL Barista Express — the whole loop on one footprint
Its conical burr grinder grinds on demand straight into a 54 mm portafilter, and the razor dose-trimming tool levels the bed to a repeatable height — two beginner variables removed in one motion. Low-pressure pre-infusion eases water in before full pressure. One caution: it ships with dual-wall (pressurised) baskets as well as single-wall ones, and dual-wall baskets add resistance of their own, so they forgive a bad grind while hiding the feedback this article depends on.
$499.95·built-in burr grinder·67 oz tankCheck price →
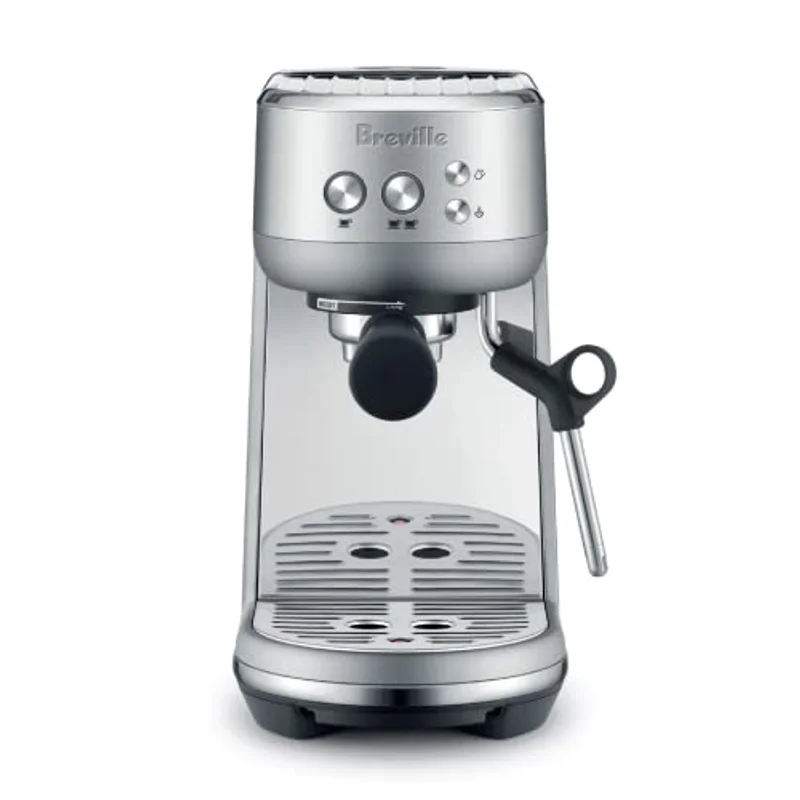
Breville Bambino — automates the hardest part
Its wand textures milk automatically to an adjustable temperature and texture setting, collapsing the milk section above into one button: an advantage on a weekday, a trade-off if latte art was the point. No grinder, so step 3 needs one alongside it.
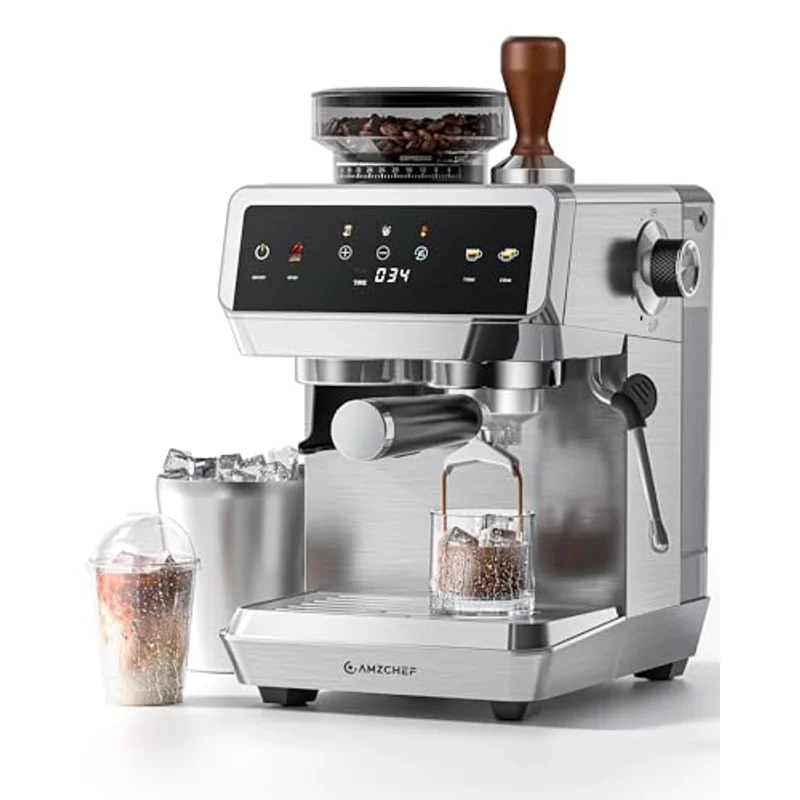
AMZCHEF with grinder — the temperature dial, unusually cheap
Brew temperature is adjustable from 190 to 201 °F — the fourth variable in the dial-in order above, normally a feature costing hundreds more, and it earns its keep with lighter roasts. With 44 grind settings and a 60 oz tank, it offers every control this article asks for at about $200.
The budget end of the market runs manual wands and small boilers. The CASABREWS 3700 Essential ($99.99) pairs a 1,350 W boiler with a manual wand in a body 5.7 inches wide; the Chefman CraftBrew ($79.99) pairs a 15-bar pump with a 1.5 L reservoir and lets you programme shot volume. Both pull real espresso by the procedure above. What a small boiler costs is rhythm: brew, wait for steam, steam, purge, wait to come back down — a minute for one drink, and the main reason to spend more if you make four. Programmed volume is a convenience, not a substitute for the scale, and "15 bar" is the pump's maximum, not the pressure at the puck: espresso brews at roughly 9 bar.
Super-automatics and capsules skip most of this
A super-automatic like the De'Longhi Magnifica Start ($649.95) grinds, doses, tamps and brews behind one button, with 13 grind settings, adjustable intensity and three one-touch recipes. There is no portafilter, so steps 3 through 8 do not exist for you: you gain consistency with no learning curve and give up the ability to correct, because your only controls are grind setting and intensity. Its frother is manual, so the milk half of this article still applies.
A capsule machine like the Ninja CFN601 ($279.95) goes further: dose, grind and tamp were decided in a factory and sealed in aluminium. Its Nespresso-original-compatible side pulls a 1.35 oz espresso, a 3.75 oz lungo or a 1 oz over-ice, alongside a 12-cup drip side. Nothing above applies, because there is nothing to dial — the most repeatable and least improvable espresso you can own. See our machine class comparison.
How we know what we know here
The technique above is standard, widely-documented espresso practice, and the machine-specific notes come from published specifications and what ships in the box.
To be straightforward about our limits: we compare specifications and prices, we do not run a testing lab, and we do not publish ratings we cannot verify. You will not find a star rating anywhere on this site, because no rating data we could stand behind exists for these machines.
Your first week
A plan, because "practise" is useless advice. Buy one bag of dated beans and spend the whole bag on this; expect to pour a few down the sink, because beans are the cheapest part of the curve.
Days 1–2: get the loop working
Ignore taste entirely. The only goal is 18 g in, 36 g out, in 25 to 30 seconds, by moving the grind and nothing else. Write down the three numbers and the grind setting each time. When you hit the window twice in a row from a cold start, you have a baseline.
Days 3–4: make it taste like something
Taste each shot as espresso, before any milk, and chase sweetness with the ratio: stop at 32 g, then at 40 g, from the same 18 g dose, and notice how differently they read.
Days 5–6: add the milk
Practise with water and a drop of dish soap in the jug: it foams similarly, costs nothing, and teaches you the sound and the whirlpool. Then do it for real — whole milk, thermometer on the jug, stop at temperature, wipe the wand every time. Your first jugs will be too foamy.
Day 7: lock in the routine
Run it as a morning: warm up, purge, grind, distribute, tamp, lock, pull to weight, steam, pour, wipe. A settled routine is around three minutes, most of it waiting. Write your recipe on a sticky note and stick it to the machine. Somewhere in that week it clicks, and the question becomes whether it is worth the counter space — which we answered with arithmetic.
Questions people actually ask
What's the right dose and ratio for a double shot?
Start at 18 g of dry coffee in, 36 g of liquid espresso out, in 25–30 seconds from the moment the pump starts — a 1:2 ratio in roughly half a minute. If your basket is smaller, keep the ratio and scale the dose: 15 g in, 30 g out works the same way. Adjust the grind until the time falls in the window, then the output weight to taste.
My espresso tastes sour. What should I change?
Sour, sharp and thin means under-extracted: not enough coffee dissolved into the water, so you are tasting the acids that come out first. Grind finer by one or two steps and pull again with the same dose and output weight. If the shot already took 25–30 seconds, the cause is usually heat loss or channelling — warm the portafilter and cup with a blank shot of water, and level the bed more carefully.
Do I really need a scale, or can I use the scoop?
You need a scale, and it should read to 0.1 g. The scoop measures volume, and the weight of a scoop changes with roast level and grind size, so dosing by scoop makes every shot behave differently for reasons you cannot see. A scale is also how you stop the shot at the right output weight, since crema makes volume unreliable.
Can I use pre-ground coffee for espresso?
Liquid will come out, but you give up espresso's main control. Pre-ground coffee is one fixed grind size, so when a shot runs too fast or too slow you cannot correct it, and it has lost most of its aromatics and carbon dioxide, which is why the crema is thin and pale. A burr grinder — inside the machine or beside it — is the upgrade that matters most.